
I finished the Christmas cards yesterday so I’m ready to start addressing them with the goal of getting them in the mail by Monday…..maybe earlier.
Normally I’d do a different post for each card design but I’m just going to put them all here without much in the way of instructions. I’ve shared enough of the construction in previous posts.
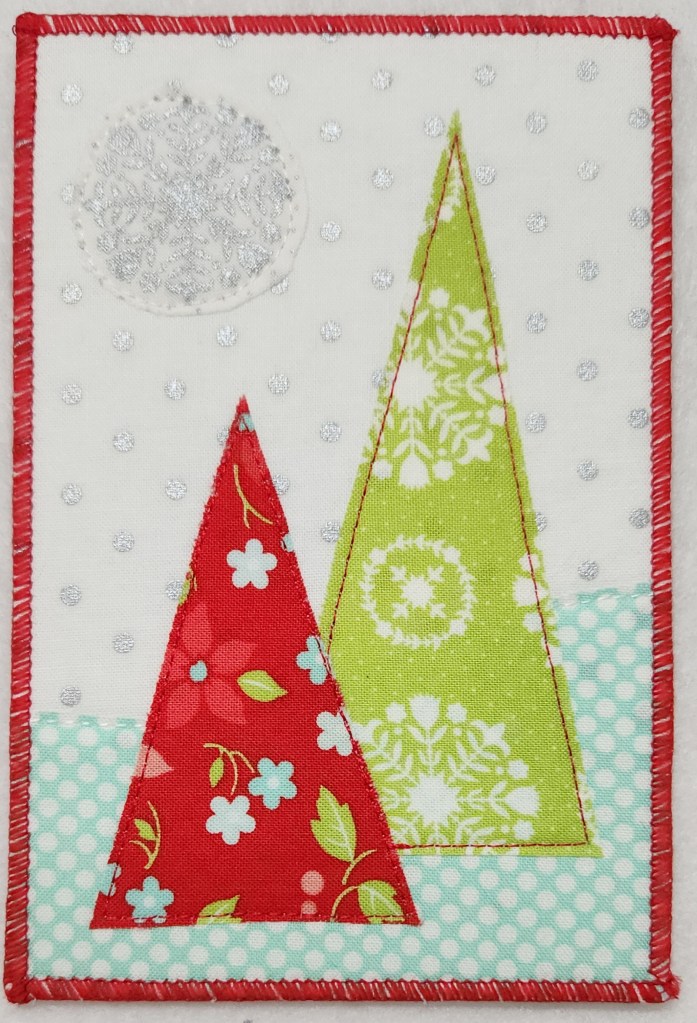
Every year I make a tree-themed card. This year the card was inspired by the fabrics in Kim’s quilt. I quilted her Christmas quilt for her last month and I loved the fabrics so much that I asked for her scraps. Those scraps became these cards. I think it’s very easy to figure out how I made them. The stitching is minimal so they came together pretty quickly. I made 25 of these.
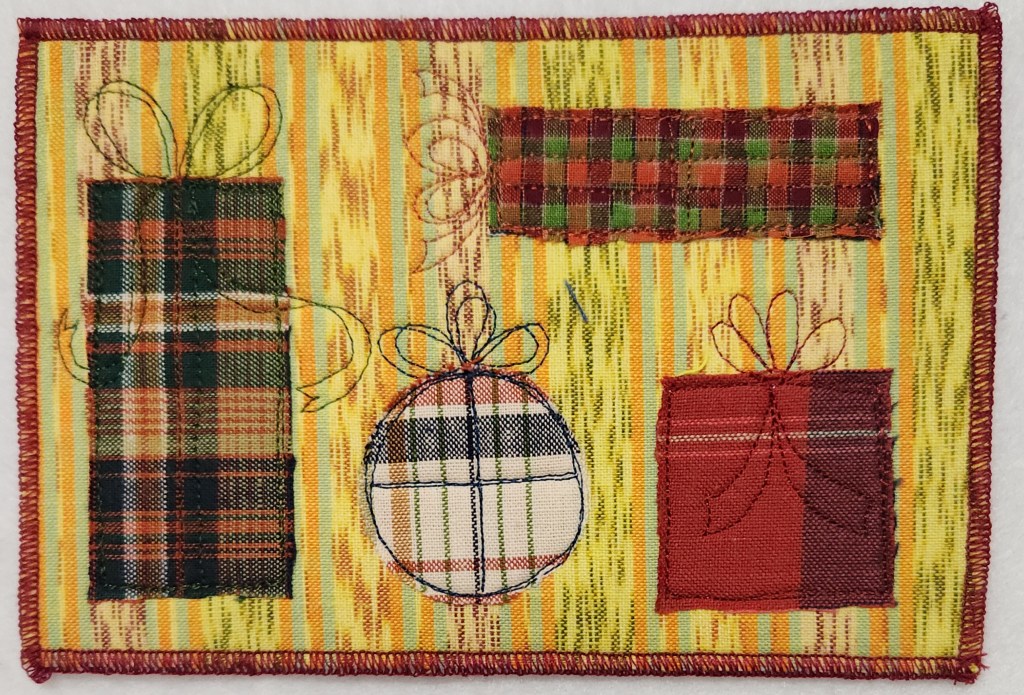
Like the tree cards, these cards started with the fabric. I really wanted a card design using plaid fabrics. I had 2 fat quarters of goldish and used those for the background. I had a bunch of scraps plaids leftover from a veterans quilt I made several years ago. I added fusible web to the back of them and then free hand cut out the packages.
I picked 5 different thread colors and then tried to be as creative as I could with the package decorations. This turned out to be more stitching than I anticipated but it was good free-motion practice! These took enough sewing time for me to think I will send these to my sewing friends because they will appreciate the work more than other people might.
I made 26 of these and that was determined by the amount of background fabric that I had.
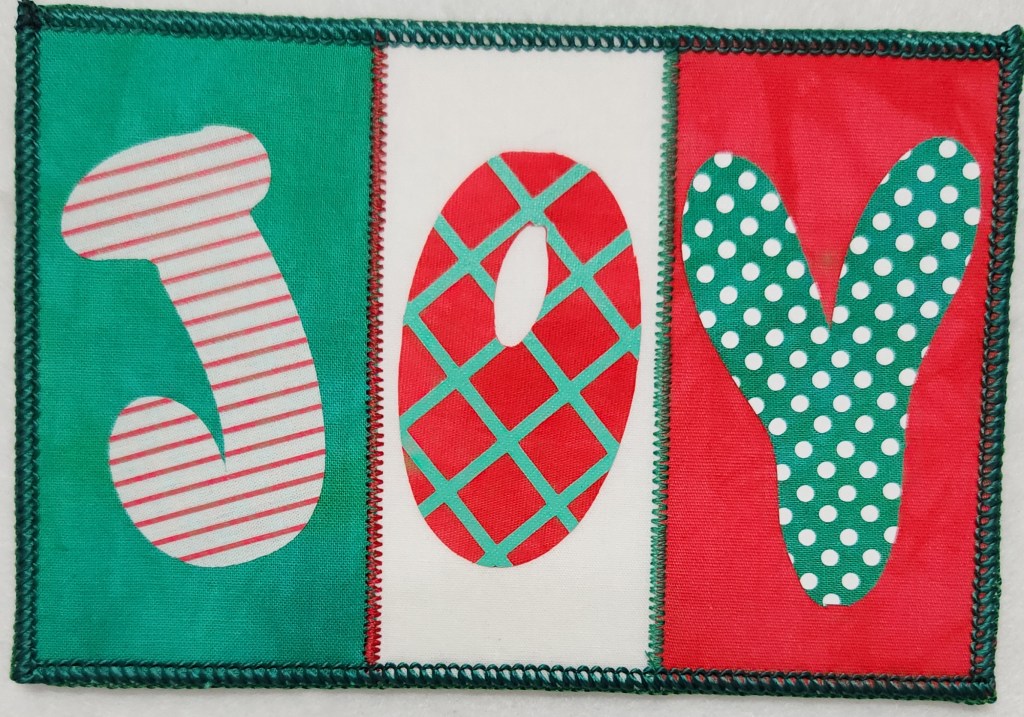
Now that I have the Cricut, I want one of my card designs to utilize the Cricut and, boy howdy, did I use it for these cards! There are only 3 fabrics: red, green and white. The letters are “made fabric” by adding iron on vinyl to the fabric.
To make the sheets for iron on, I had to find the texture patterns in the Cricut library and the copy and past multiple copies together until I got a whole sheet of dots or stripes or plaid. That took a few hours and that was the easy part! Weeding took forever, partly because I needed a new cutting blade. But, I eventually got my pattern fabrics and then used the Cricut again to cut out the letters. The Cricut has a tiny rotary blade that works great for fabrics. I add fusible to the back of the fabric first and then stick it to the sticky backing board. It works great. Cutting the letters and doing the minimal stitching were the easy parts!
I made 21 of these cards based on how many letters I could cut from my texture fabrics.

I waited until all the cards were done to pull out the serger and edge the cards. I don’t use my serger often, but I sure love having it when I work on the cards!
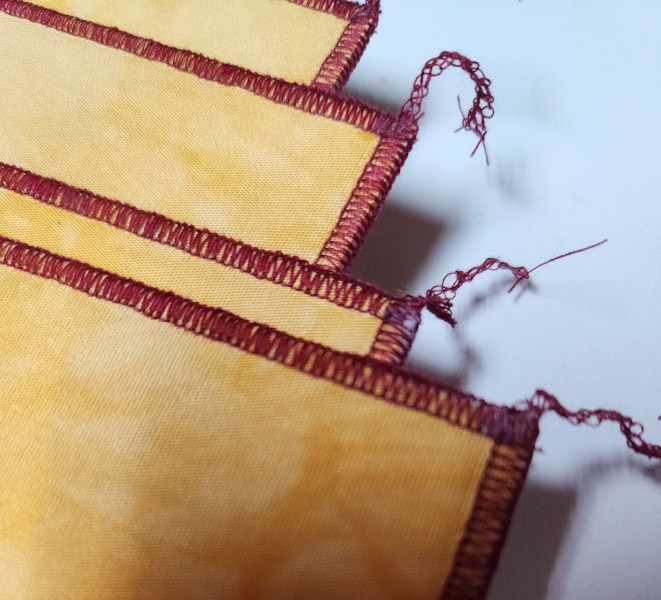
The last step is to add a drop of glue at the end corners to keep them from unraveling.
I’m really happy with the cards this year. Some years I have a design that just doesn’t work out as well as I envisioned. This isn’t one of those years!
Next up are winter birthday cards.


Leave a comment